How to Make a Custom Dress Form for a Perfect Fit?

Time:2026-09-13 Author:Henry
0%

A custom dress form can transform fitting from guesswork into a measured, repeatable process. This guide explains how to make custom dress form​ for your unique proportions, posture, and sewing goals. Unlike standard mannequins, a personal form reflects your shoulder slope, bust placement, waistline, and hip shape. That difference matters when drafting fitted bodices, jackets, or dresses.

You will learn how to take accurate measurements, build a stable foundation, and shape the form with padding materials. A close-fitting garment, measuring tape, cotton batting, and careful labeling are essential tools. The process also requires patience. Small changes around the bust or back can affect the entire garment. Work beside a mirror, and check the form against your body from several angles.

Expect some imperfections.

The first version may feel uneven or slightly too firm. That is normal. Experienced dressmakers often refine a form after testing it with a muslin toile. This practical check reveals compressed padding, misplaced seams, or an inaccurate waistline. Do not treat measurements as permanent facts; bodies change with posture, clothing, and movement. Record each adjustment clearly, and avoid pulling tape tightly during measurement. Reliable results come from consistent methods, not rushed shaping. With careful construction and honest fitting tests, your custom dress form can become a dependable studio tool for creating garments that look balanced and feel comfortable.
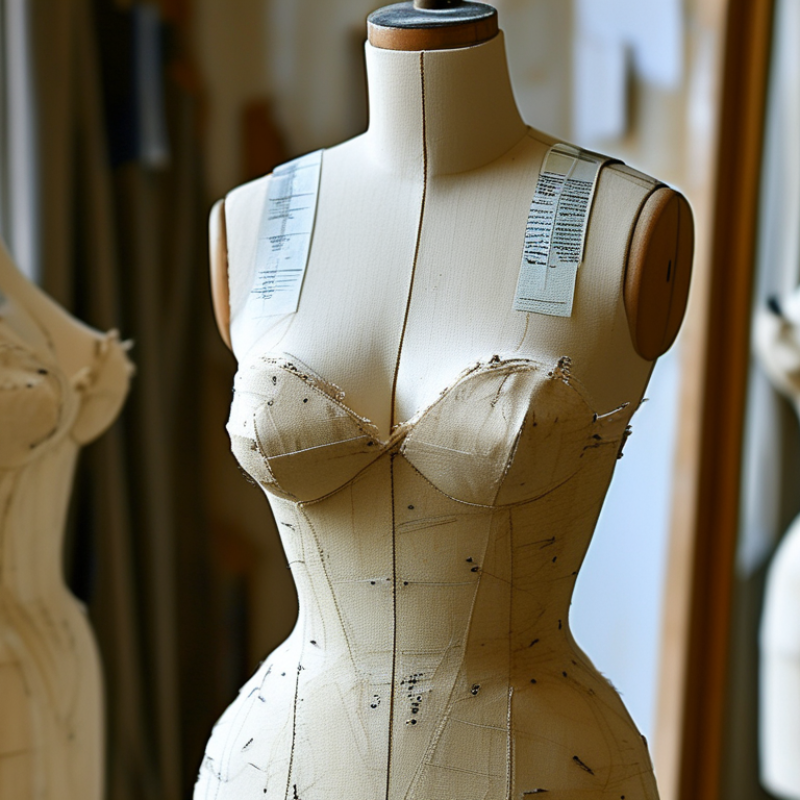
How to Make a Custom Dress Form for a Perfect Fit?

Gather Materials and Choose a Custom Dress Form Design

How to Make a Custom Dress Form for a Perfect Fit?

Gather materials before choosing a custom dress form design. You will need a close-fitting shirt, measuring tape, stuffing, duct tape, cardboard, and a sturdy stand. A flexible tape measure is essential. Record your bust, waist, hip, shoulder, and back-waist length twice. Small errors become obvious on fitted garments.

Choose a design that matches your sewing goals. A torso form suits bodices and dresses, while a full-body form supports trousers and fitted coats. For a useful working surface, cover the form with a thin cotton layer. Avoid making the shell too hard. Pins need controlled resistance, not a rigid wall. My first form was overstuffed around the waist, so every test garment looked smaller than expected. That mistake taught me to compare the form with real measurements, not appearance.

Reliable sizing matters beyond personal comfort. The National Retail Federation and Appriss Retail reported that 17.6% of online sales were returned in 2023, with fit among common apparel concerns. A carefully measured form can reduce similar fitting problems during sampling. ASTM International’s body-measurement guidance also supports consistent points, including bust, waist, hip, and vertical lengths. Mark these reference lines with contrasting thread. Check them from the front and side. Do not rush. A handmade form may still need adjustment after the first garment fitting. Real bodies shift, and posture changes the result.

How to Make a Custom Dress Form for a Perfect Fit?

Gather Materials and Choose a Custom Dress Form Design

Accurate measurements are the foundation of a well-fitting custom dress form. Record the body circumference and length measurements below, then choose a form design that matches the intended garment projects.

This sample measurement profile uses centimeters and includes the key areas normally checked when shaping a dress form: bust, waist, hip, shoulder width, and back waist length. Use a flexible measuring tape, keep it level around the body, and transfer each measurement carefully to the chosen dress form design.

Take Accurate Body Measurements for a Precise Fit

A custom dress form begins with reliable measurements, not guesswork. The SizeUSA anthropometric project collected more than 10,000 three-dimensional adult body scans, revealing substantial variation in body proportions (SizeUSA, TC², 2004). Do not rely on standard size charts.

Wear thin, close-fitting clothing and stand naturally. Keep the tape level across your back and parallel to the floor. Measure the bust at its fullest point, the waist at its natural crease, and the hips at their fullest circumference. Record each measurement twice. If the results differ, measure again. A loose tape can add unwanted ease, while a tight tape creates a form that feels restrictive. ASTM D5585 also recommends consistent landmarks and measurement procedures for apparel sizing.

Add vertical measurements as well. Record shoulder-to-waist, waist-to-hip, and neck-to-waist lengths. These details control darts, seams, and neckline placement. The UK National Sizing Survey scanned approximately 11,000 people and showed why height and shape cannot be predicted from circumference alone (SizeUK, 2004–2008). Mark the waistline with elastic before measuring. It gives a clearer reference.

I once measured over a thick shirt. The finished form was too large. That mistake was useful. It proved that careful technique matters more than expensive equipment. Transfer the measurements to the form gradually, then test a basic fabric cover. Check the bust, waist, and hip levels again before shaping the final surface.

Build the Dress Form Around Your Unique Body Shape

A custom dress form should mirror your body, not an imaginary standard size. The SizeUK national sizing survey scanned more than 11,000 people, revealing wide differences in height, proportions, and posture. That evidence matters when drafting close-fitting clothing. Commercial forms often assume balanced shoulders, a centered waist, and symmetrical hips. Real bodies rarely cooperate.

Wear a fitted T-shirt and stand naturally, without pulling your stomach inward. Mark your bust, waist, hip, shoulder, and neck lines with narrow elastic. Add further landmarks for a prominent abdomen, rounded upper back, uneven shoulders, or one hip sitting higher. Measure each side separately. Record posture too. A relaxed body is more useful than a posed one. ASTM D5585 includes dozens of body measurements, supporting a fuller approach than measuring bust, waist, and hips alone. Stuff a firm base form with batting, then wrap it with fabric marked in your personal measurements. Check the form against your body in a mirror. Pinch excess material at the shoulder and hip areas, then adjust gradually. Small corrections matter.

This part takes patience.

Do not chase perfect symmetry. I once corrected a tilted waistline because it looked uneven, then discovered that the “mistake” matched my natural stance. Recheck the form while sitting and moving. Clothing must fit a living body, not a frozen mannequin.

Sources: SizeUK National Sizing Survey, 2004; ASTM International, D5585 Standard Tables of Body Measurements.

Add Padding, Marking Lines, and a Removable Cover

How to Make a Custom Dress Form for a Perfect Fit?

A custom dress form begins with accurate body measurements, not guesswork. The SizeUSA anthropometric survey used 3D scans from more than 10,000 adults. Its findings showed substantial variation in body proportions, especially across bust, waist, and hip measurements. Use your own measurements instead of relying on standard size charts. Wear a fitted shirt, stand naturally, and keep the tape level. Record each measurement twice.

Add padding gradually with polyester batting or foam. Build the bust, stomach, and hip areas first. Secure each layer with pins or temporary stitches. Check the form against your body often. My first padding attempt made the waist too narrow. That mistake taught me to measure after every adjustment. Small changes matter. ASTM International measurement tables can guide your reference points, but they cannot replace your personal shape.

Mark the bust line, waistline, hip line, and center front with contrasting cotton tape. Keep the lines straight and clearly visible. A removable cover should fit smoothly without compressing the padding. Use a firm stretch fabric, then close it with a zipper or overlapping seam. Mark seam allowances directly on the cover. The cover must come off easily. Otherwise, alterations become frustrating. Leave a little extra ease around the shoulders and neckline; these areas often need refinement after the first fitting.

How to Make a Custom Dress Form for a Perfect Fit? - Add Padding, Marking Lines, and a Removable Cover

Stage Main Task Recommended Materials Key Dimensions or Data Practical Method Quality Check
1. Prepare Measurements Record the body measurements needed to shape the form. Flexible measuring tape, notebook, pencil, mirror Bust, waist, hip, shoulder width, back waist length, neck, and armhole depth Measure over close-fitting clothing. Keep the tape level and comfortably snug without compressing the body. Take each measurement twice. Differences greater than 0.5 cm should be rechecked.
2. Build the Core Create a stable body-shaped base. Firm foam, molded body shell or taped foundation, lightweight stuffing, strong tape Core circumference should be approximately 2–4 cm smaller than the target body measurement before padding. Keep the center front, center back, and waist level aligned while constructing the core. The base must stand upright without twisting or collapsing when lightly pressed.
3. Add Bust and Hip Padding Shape the form to match the wearer’s three-dimensional proportions. Polyester batting, cotton batting, thin foam, stretch jersey, pins, hand-sewing thread Add material gradually in layers of about 0.5–1 cm, checking circumference after each layer. Place padding symmetrically at the bust, side bust, waist, abdomen, and fullest hip areas. Blend all edges smoothly. Bust and hip contours should be smooth, balanced from side to side, and free from hard ridges.
4. Match Circumferences Adjust the padded form to the recorded measurements. Measuring tape, removable pins, narrow strips of batting Bust, waist, and hip circumference should be within approximately ±0.5 cm of the target measurements. Measure at the fullest bust, natural waist, and fullest hip. Keep the tape horizontal around the form. Confirm that the difference between the bust, waist, and hip levels reflects the wearer’s actual proportions.
5. Mark Reference Lines Add accurate lines for fitting and garment placement. Flexible ruler, washable fabric marker, twill tape, pins, level Center front, center back, bust line, waistline, hip line, shoulder line, side seam, and neckline Mark the waistline first, then measure equal distances to establish the bust and hip lines. Apply twill tape for permanent visual guides. Horizontal lines must remain level all around the form; vertical lines should not drift toward the front or back.
6. Mark Bust Apex and Balance Points Identify the points used to position darts and maintain garment balance. Ruler, washable marker, small measuring tape Bust apex position, shoulder-to-waist length, and front-to-back balance Mark the fullest point of each bust and compare the distance from the center front and waistline. Both apexes should be at the correct height and should reflect the wearer’s natural asymmetry when necessary.
7. Make the Removable Cover Create a close-fitting outer layer that protects the padding. Firm stretch fabric, matching thread, zipper or hook-and-loop tape, bias binding Use approximately 1–3% negative ease so the cover remains smooth without compressing the form. Divide the cover into front and back sections or use a center-back opening. Finish the neckline and armholes neatly. The cover should lie flat, remain removable, and avoid wrinkles that could distort fitting results.
8. Recheck and Fine-Tune Validate the finished form before using it for garment fitting. Measuring tape, level, test garment, pins, notebook Check all circumferences, vertical lengths, line positions, stability, and symmetry. Fit a simple test garment and observe drag lines, gaping, tightness, and uneven hems before making final padding changes. The test garment should hang evenly, with reference lines matching the marked lines on the form.

Measurement tolerance guide: aim for approximately ±0.5 cm for circumference checks and keep all marked horizontal lines level around the form.

Test the Form and Adjust It for Better Garment Fitting

After building a custom dress form, test it with a simple muslin garment. Use the same measurements as your body. Mark the center front, center back, bust line, waistline, and hip line clearly. Place the muslin on the form and check whether these lines stay level. A tilted waistline often shows uneven padding or an inaccurate measurement.

Wear the muslin yourself and move naturally. Sit, raise your arms, and take a few steps. Watch for pulling across the bust, loose fabric near the shoulder, or diagonal wrinkles around the waist. Pin each problem directly on the garment. Then transfer those changes to the form with small padding layers. Wool batting works well because it compresses gradually and holds pins securely. Do not add too much at once. Small changes are easier to evaluate.

My first form was too narrow at one shoulder. I added padding evenly, which created another fitting problem. That mistake taught me to adjust one area at a time. Compare the form with your body after every change. Check both sides, even when only one side looks wrong. Human bodies are rarely symmetrical. A perfectly balanced form may not fit you perfectly. Test the revised muslin again, especially around the armhole and hip. Keep notes about each adjustment, because memory becomes unreliable during repeated fittings. A slightly imperfect form can still produce excellent garments when its differences are understood and tested carefully.

FAQS

Why should a custom dress form reflect my actual body shape?

Standard forms often assume even shoulders, centered waists, and symmetrical hips. Real bodies differ. A custom form should copy your posture, proportions, and natural stance. This produces more reliable garment adjustments.

Which body landmarks should I mark before shaping the form?

Wear a fitted shirt and stand naturally. Do not pull your stomach inward.

How can I avoid inaccurate body measurements?

Keep the measuring tape level and record every measurement twice.

How should I add padding to the dress form?

Build the bust, stomach, and hip areas gradually with batting or firm foam.

What markings should a removable cover include?

Use contrasting cotton tape for the bust, waist, hip, center front, and center back.

How do I test whether the form fits my body?

Make a simple muslin using your body measurements. Place it on the form and inspect the marked lines.

What should I do when only one side looks incorrect?

Adjust one area at a time instead of padding both sides evenly.

How can I manage repeated fitting adjustments?

Pin problems directly on the muslin, then transfer them to the form with thin padding layers.

Conclusion

Creating a custom dress form begins with selecting suitable materials and deciding on a design that reflects your sewing needs. The process of how to make custom dress form starts with taking precise measurements of your bust, waist, hips, shoulder width, back length, and other key areas. These measurements help you build the form around your individual proportions instead of relying on standard sizing. Carefully shaping the structure ensures that it represents your natural posture and body contours.

Once the basic form is complete, add padding to refine uneven areas and create a smoother silhouette. Mark important lines, such as the center front, center back, waist, and hip levels, to guide accurate garment construction. A removable cover can protect the form and make adjustments easier. Finally, test the dress form with a sample garment, check areas that feel too tight or loose, and adjust the padding or measurements until the fit becomes balanced and comfortable.


Henry

Henry

Henry is a dedicated marketing professional with a profound expertise in the company's offerings. With years of experience in the industry, he possesses an impressive understanding of the market dynamics and consumer behaviors that drive success. Henry is committed to sharing his insights through......